Astroでreveal.jsを使いたい!
以下の記事を読んで、「自分のサイトにスライドを直接埋め込める!これはかっっこいいぞ!Reveal.jsおしゃれすぎる!」と感じ、自分のブログでも使いたいと思いました。
ブログ記事へのスライド埋め込みプラグイン Hexo Reveal Embed を公開した
Astroでreveal.jsを使う
Astroでreveal.jsを使うのはそこまで難しくありません。
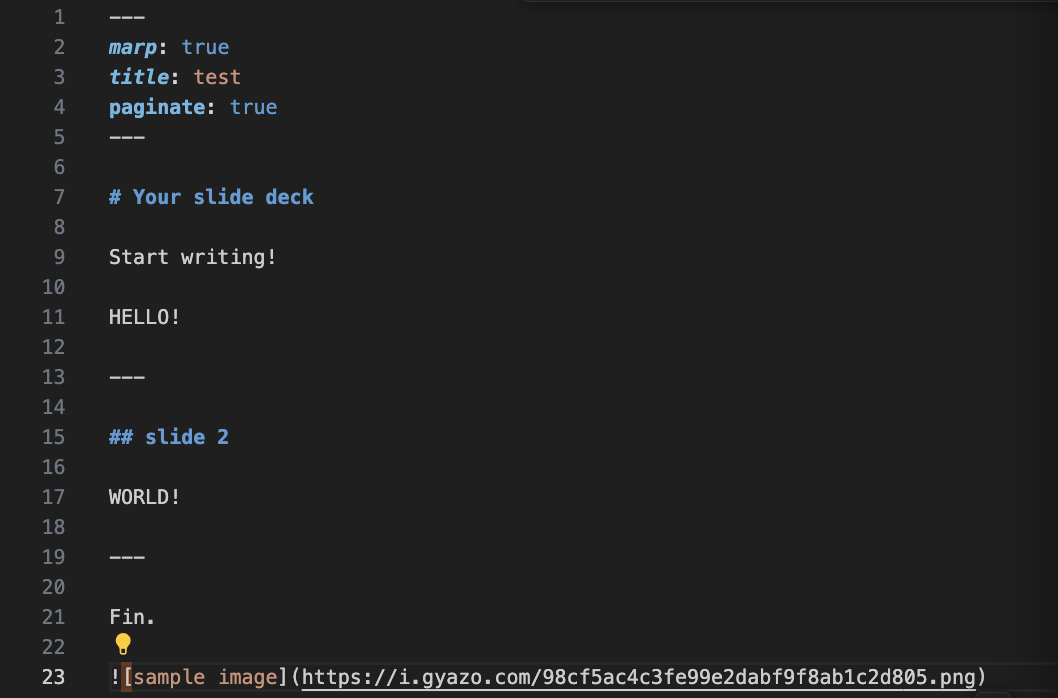
例として以下の厚生で作成しました。
スライド内で画像を使うこともあると思うので、スライドごとにフォルダを分けるようにしました。src/content/slides/test/index.md
---
marp: true
title: test
paginate: true
---
# Your slide deck
Start writing!
HELLO!
---
## slide 2
WORLD!
---
Fin.
スライドを表示するには、reveal.jsをインストールします。
npm install reveal.jsそしてsrc/pages/slides/[...slug].astroに以下のように記述します。
---
import { getCollection } from 'astro:content';
import 'reveal.js/dist/reveal.css';
import 'reveal.js/dist/theme/black.css';
export async function getStaticPaths() {
    const slideEntries = await getCollection('slides');
    return slideEntries.map(entry => ({
        params: { slug: entry.id }, props: { entry },
    }));
}

// params
const {entry} = Astro.props;
---
<!DOCTYPE html>
<html lang="ja">
<head>
    <meta charset="UTF-8">
    <meta name="viewport" content="width=device-width, initial-scale=1.0">
    <title>{entry.data.title}</title>
</head>
<body>
    <div class="reveal">
        <div class="slides">
            <section data-markdown>
                <textarea data-template set:html={entry.body}>
                </textarea>
            </section>
        </div>
    </div>
</body>
</html>

<script>
    import Reveal from "reveal.js";
    import Markdown from "reveal.js/plugin/markdown/markdown.esm.js";

    const reveal = document.querySelector(".reveal");
    if(reveal) {
        const deck = new Reveal({
            plugins: [Markdown],
        });
        deck.initialize();
    }
</script>これで、/slides/testにアクセスするとスライドが表示されるようになります。
実際に次のURLでスライドを表示してみました。
投稿の中に直接スライドを埋め込むこともできます。
私は、MDXを使っていないので、毎回これを埋め込む必要がありますが、MDXを使っている場合はコンポーネント化しておくと便利なはずです。
<div class="astro-reveal-wrapper">
    <div class="astro-reveal-toolbar">
        <div id="id" class="astro-reveal-embed">
            <iframe src="/slides/test" allowfullscreen loading="lazy"></iframe>
        </div>
        <div class="astro-reveal-toolbar-inner">
            <button class="astro-reveal-fullscreen" data-target="id">⤢</button>
        </div>
    </div>
</div>
実際に埋め込んだものがこちらです。
(※ 下記で触れている画像の件はこちらのスライドでは解決しています。)
あれ、画像が。。。
うまくいっているように見えますが、このままだと実はローカルパスの画像が表示されません。
通常マークダウンファイルをAstroで描画するときは、以下のコードのrender関数の中で、ローカル参照の画像パスを変換(ビルド時には、対象のディレクトリに出力もしている)しているのですが、私の場合はentry.bodyという変換前のデータを使っているため、画像のパスが変換されていません。
---
import { render } from 'astro:content';
略
export async function getStaticPaths() {
    const slideEntries = await getCollection('slides');
    return slideEntries.map(entry => ({
        params: { slug: entry.id }, props: { entry },
    }));
}
const { entry } = Astro.props;
const {Content} = await render(entry);
---
<Content />
迷走する。。。
以下のような試行錯誤をしました。
entry.render();
getCollectionを用いたレンダリングの場合、Componentは取得できますが、それをHTMLに変換する方法がわかりませんでした。- Astroのエンドポイント機能を使って、API経由でHTMLを取得し、そのHTMLをMarkdownに変換する
エンドポイント側だと
今のところ、そういう想定はされていないようです。
Return Astro (HTML) components from API endpoints
- スライドのHTMLをAstroで描画し、そのHTMLをfetchする
api/slide/[...slug].astroを用意し、そこでスライドのHTMLを描画し、そのHTMLをfetchすることで、画像のパスを変換することができました
---
(略)
const ret = await fetch(Astro.url.origin + "/api/slide/" + entry.id);
const body = await ret.text();
// html to markdown
// 雑ですが、おおよそ変換できます
var markdown = await (await unified()
    .use(rehypeParse)
    .use(rehypeRemark)
    .use(remarkStringify)
    .process(body))
    .toString().replace(/\*\*\*/g, '---');
---
・
・
・・
あれ、、、build時に、スライドが表示されない。。。
buildの順番?
npm run build
npm run preview上記コマンドで表示を確認してみると、なんとfetch部分に404画面のHTMLが返ってきているではありませんか、ビルド順といえばいいのでしょうか。ビルド時にはまだapi/slide/[...slug].astro側のページが用意されておらず、404画面が返ってきてしまうのです。。
これは困った。404にならないようにするには、エンドポイントを利用しないと。。。でもエンドポイントだと
slotを使ってComponentをレンダリング(成功例)
どうすれば画像のパス問題が解決できるか色々と悩んでいたのですが、なんとslotは事前にレンダリングできるみたいです。
百聞は一見に如かず、さっそくコードを見てみましょう。
components/slide/Slide.astro
---
import {unified} from 'unified';
import rehypeParse from 'rehype-parse';
import rehypeRemark from 'rehype-remark';
import remarkStringify from 'remark-stringify';

// slotで受け取ったコンポーネントをレンダリング. 詳細は以下リンク参照
// https://docs.astro.build/en/reference/api-reference/#astroslotsrender
const html = await Astro.slots.render('default');
var markdown = await (await unified()
    .use(rehypeParse)
    .use(rehypeRemark)
    .use(remarkStringify)
    .process(html))
    .toString()
    .replace(/\*\*\*/g, '---')
    .replace(/\[#]\(#[^\)]*\)/g, '');
    // markdown->htmlの変換時にheading tagの追加など余分な処理が入っているので、修正
---
<div class="reveal">
    <div class="slides">
        <section data-markdown>
            <textarea data-template set:html={markdown}>
            </textarea>
        </section>
    </div>
</div>

<script>
    import Reveal from "reveal.js";
    import Markdown from "reveal.js/plugin/markdown/markdown.esm.js";

    const reveal = document.querySelector(".reveal");
    if(reveal) {
        const deck = new Reveal({
            plugins: [Markdown],
        });
        deck.initialize();
    }
</script>上記のSlideコンポーネントを作成し、スライドページで以下のように記述します。pages/slides/[...slug].astro
---
import { getCollection } from 'astro:content';
import Slide from '@components/slide/Slide.astro';
import 'reveal.js/dist/reveal.css';
import 'reveal.js/dist/theme/black.css';
export async function getStaticPaths() {
    const slideEntries = await getCollection('slides');
    return slideEntries.map(entry => ({
        params: { slug: entry.id }, props: { entry },
    }));
}

// params
const {entry} = Astro.props;
const {Content} = await entry.render();
---
<!DOCTYPE html>
<html lang="ja">
<head>
    <meta charset="UTF-8">
    <meta name="viewport" content="width=device-width, initial-scale=1.0">
    <title>{entry.data.title}</title>
</head>
<body>
    <Slide>
        <Content/>
    </Slide>
</body>
</html>
こうすることで、画像のパスも変換され、ビルド時にもスライドが表示されるようになりました。
markdown->html->markdownという流れで変換しているので、もしかすると想定外の変換により、スライドが崩れることがあるかもしれません。今のところreplaceで対応しています。
もっときれいにするのであれば、Slideにrowフィールドを追加して、画像パスだけContentのものと書き換えるような処理にするのが良さそうです。
pages/slides/[...slug].astro
<Slide row={entry.body}>
    <Content/>
</Slide>
components/slide/Slide.astro
---
// ...略
const {row} = Astro.props;
const html = await Astro.slots.render('default');
// rowの中の画像パスをhtmlの中の画像パスに変換
const markdown = replaceMDImagePathToHTMLImagePath(row, html);
---
<!-- ...略 -->
<textarea data-template set:html={markdown}></textarea>
<!-- ...略 -->
おまけ
独自レンダラーを作る?
これはslotのレンダリングが使えることに気がつく前に考えていたことです。
「entry.bodyを使って、中の画像は自分で変換するしかなさそうな?」
「つまり、独自レンダラーを作ろう!」ってことか。。。
Astroの中にrehypeImagesとgetMarkdownCodeForImagesという参考になりそうな処理は見つけています。
todo: entry.bodyを使って画像のパスを変換する処理を実装
おわりに
実はLTとかこれまでしたことがないので、スライドを作る機会はほとんどなかったのですが、これを機会に今後はLTとかもやっていきたいなと思っています。